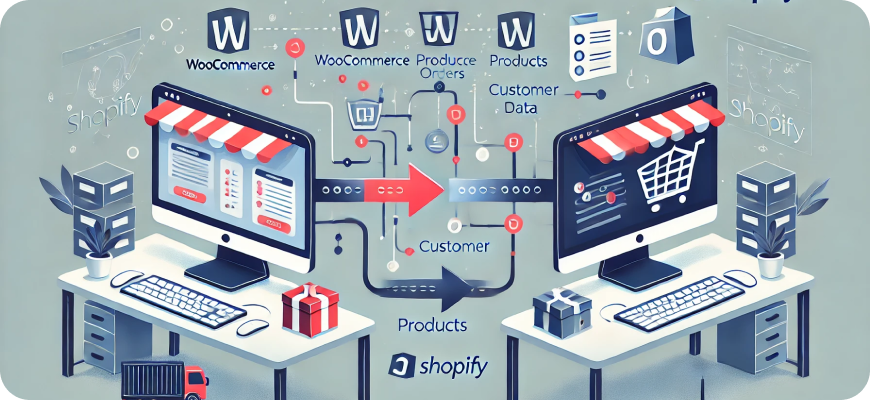
How to Migrate from WooCommerce to Shopify: A Comprehensive Guide
Migrating from WooCommerce to Shopify is a significant step for any eCommerce business. While WooCommerce is a popular and flexible platform, Shopify’s user-friendly interface, robust app ecosystem, and superior customer support often attract merchants looking for a simplified, scalable solution. Migration, however, is a process that requires careful planning and execution to ensure a smooth transition without losing crucial data or interrupting your business operations.
In this comprehensive guide, we’ll walk you through the step-by-step process of migrating from WooCommerce to Shopify while preserving your product data, customer information, orders, SEO, and other critical elements.

Why Migrate from WooCommerce to Shopify?
Before diving into the steps, it’s worth highlighting some reasons why you might choose to migrate from WooCommerce to Shopify:
- Ease of Use: Shopify is known for its user-friendly interface, making it easier for business owners without technical expertise to manage their stores.
- Hosting and Security: Shopify is a hosted platform, meaning it handles hosting, security, and performance optimization, allowing you to focus on growing your business.
- App Ecosystem and Integrations: Shopify offers a large app store with integrations for marketing, inventory management, customer support, and more.
- Customer Support: Shopify provides 24/7 support, which can be beneficial when troubleshooting issues.
- Scalability: Shopify is a highly scalable platform that grows alongside your business without the need for extensive backend management.
Pre-Migration Preparation
Before starting the migration process, it is crucial to prepare your store to ensure a seamless transition. Here are some key preparatory steps:
1. Backup Your WooCommerce Store Data
While data loss is rare during migration, creating a full backup of your WooCommerce store gives you peace of mind and a safety net in case anything goes wrong. Backup your store’s files, database, and all related content using plugins like UpdraftPlus or through your hosting provider.
2. Audit Your Current Store
Conduct a thorough review of your WooCommerce store, including:
- Products: Check for outdated or duplicate products.
- Customer Data: Ensure customer records are accurate and up-to-date.
- Orders: Review order history to ensure completeness.
- Pages and Content: Make note of any custom pages, blogs, or other content that need to be migrated.
3. Set Up a Shopify Store
Create an account on Shopify and set up your new store. During the setup process, you can choose a theme, configure your domain, and familiarize yourself with Shopify’s admin panel.
Migration Methods
There are three primary methods for migrating your WooCommerce store to Shopify:
- Manual Migration: Exporting and importing data manually.
- Automated Migration Tools: Using tools such as Cart2Cart or Matrixify.
- Professional Migration Services: Hiring experts to handle the process.
We’ll cover the most common approach: using a migration tool with some manual adjustments.
Step-by-Step Migration Process
Step 1: Export Data from WooCommerce
WooCommerce allows you to export your data in CSV format. Here’s how to do it:
- Export Products: Go to your WordPress Dashboard > WooCommerce > Products > Export. Select the fields you want to export (e.g., product name, description, price) and download the CSV file.
- Export Customer and Order Data: You can use plugins like “Order Export & Order Import for WooCommerce” to export customer and order data.
- Export Other Data: If you have additional data like reviews, you may need specialized plugins for exporting them.
Step 2: Import Data into Shopify
- Use Shopify’s Import Tool:
- Log in to your Shopify admin dashboard.
- Go to Apps > Store Importer.
- Select WooCommerce from the list of platforms.
- Upload the exported CSV files from WooCommerce.
Shopify’s Store Importer app will attempt to map and import products, customers, and orders.
- Check Data Accuracy:
- After importing, check your products, customers, and orders in Shopify for accuracy.
- Ensure product variants, images, prices, and inventory levels are correct.
- Manually adjust any data that didn’t import correctly.
Step 3: Migrate Pages and Content
- Manual Page Migration:
- Copy and paste page content (e.g., About Us, Contact, Blog posts) from WooCommerce to Shopify manually.
- Shopify’s page editor makes it easy to recreate pages with a similar look and feel.
- Migrate Blog Posts:
- Use Shopify’s built-in blogging feature or third-party apps to migrate blog content.
- If you have a large number of posts, you may need a plugin to automate the transfer.
Step 4: Redesign Your Store
- Select a Theme:
- Shopify offers free and premium themes tailored to different industries.
- Choose a theme that best fits your brand and customize it to reflect your existing WooCommerce design if necessary.
- Customize Navigation and Menus:
- Go to Online Store > Navigation to set up your menus and navigation structure.
- Configure Collections:
- Shopify uses collections to organize products. Create collections that match your existing WooCommerce categories or enhance the structure for improved navigation.
Step 5: Set Up Payment and Shipping Options
- Configure Payment Gateways:
- Shopify supports various payment gateways, including Shopify Payments, PayPal, and more. Go to Settings > Payments to configure your preferred payment methods.
- Set Up Shipping Settings:
- Define your shipping zones, rates, and delivery methods under Settings > Shipping and Delivery.
Step 6: Configure URLs and Redirects
Maintaining SEO during migration is crucial to avoid losing search engine rankings:
- Set Up 301 Redirects:
- WooCommerce URLs often differ from Shopify URLs. Use a URL redirect tool (like “Easy Redirects” app) to create 301 redirects from old WooCommerce URLs to their corresponding Shopify URLs.
- This ensures visitors and search engines can find your new pages without issue.
- Submit Sitemap:
- Generate and submit your new Shopify sitemap to Google Search Console to notify search engines of your updated URLs.
Step 7: Test and Optimize
- Test Your Store:
- Test every aspect of your new Shopify store, including checkout, product pages, payment processing, and mobile responsiveness.
- Ensure customer data, orders, and inventory are correct.
- Optimize for Speed and Performance:
- Compress images, remove unnecessary apps, and use Shopify’s built-in tools to optimize store performance.
- Check Analytics and Tracking:
- Set up Google Analytics, Facebook Pixel, and any other tracking tools you were using on WooCommerce.
Step 8: Launch Your New Store
When you’re confident that everything is working correctly, it’s time to launch your Shopify store:
- Update DNS Settings:
- If you’re using a custom domain, update your DNS settings to point to your Shopify store.
- Announce Your Migration:
- Notify your customers via email and social media about the transition and provide details on any changes they should be aware of.
Post-Migration Tips
- Monitor Customer Feedback:
- Pay attention to customer feedback and address any concerns promptly.
- Keep an Eye on SEO:
- Track your search rankings and traffic to ensure you haven’t lost visibility.
- Leverage Shopify’s Features:
- Explore Shopify’s app store to find tools that enhance customer experience, automate tasks, and drive growth.
- Continue Optimizing:
- Use analytics and customer insights to continuously improve your new Shopify store.

Conclusion
Migrating from WooCommerce to Shopify may seem daunting, but with the right approach, it can be a seamless and rewarding process. Shopify’s ease of use, scalability, and powerful features can take your eCommerce business to new heights. By following the steps outlined in this guide, you’ll be well-equipped to transition smoothly, retain customer trust, and unlock growth opportunities in a competitive marketplace.
Happy migrating! Your journey to a better eCommerce experience starts now.


